End to end testing with Cypress
Published by Alan Saunders on Wednesday, December 28, 2022 - 20:00
Reading Time: 6 minutes
TitleWhat is Cypress
Cypress is an end to end testing tool that allows you to check if the site/app that you have built/ made changes to still works when compared to the required functionality/ behaviour of the app/site. Cypress uses JavaScript for the actual tests.
Testing will depend on individual use cases/ requirements and there will likely more that Cypress can do that I have not touched on in this blog post, but this blog post certainly aims to cover some of the basics and a little bit more.
TitleInstalling Cypress
Cypress can be installed using npm (Node Package Manager). If you don't have npm installed then grab the installer for your operating systems from: https://nodejs.org/en/download/. When you have installed npm.
Open a new terminal window and run the commands below:
cd /your/project/path
npm install cypressTo check if cypress has installed correctly. In the terminal window run:
npx cypress openYou should then see an application window open that looks like the below screenshot:
TitleWriting tests
Writing tests in cypress is relatively easy and uses JavaScript markup. For example, if we want to test that we can go to a domain or a page on a website. Then we can use something like the following code:
describe('load domain', () => {
  it('passes', () => {
    cy.visit('https://example.cypress.io')
  })
})
The describe function is effectively a way of grouping a number of tests and the it function is the way of writing a test. The text I have 'load domain' and 'passes' can be anything that you want to describe what the test is being designed to do.
Then to check that we can load the website https://example.cypress.io then we call cy then .visit('') and pass in the domain that the test should load. Essentially you use cy to tell cypress that you want it to do something then you append the function name that you want to trigger.
When it comes to doing something more advanced like filling in a form. We can use code that looks like;
require("dotenv").config()

let x = Math.random();

it('register', function () {
    cy.visit(Cypress.env('SANDBOX_DOMAIN'))
    cy.contains('Log in').click()
    cy.contains('Create new account').click()
    cy.get('#edit-submit')
        .should('contain', 'Create new account')
        .should('have.class', 'form-submit')
    cy.get('#edit-mail').type(x + Cypress.env('EMAIL'))
    cy.get('#edit-name').type(x +Cypress.env('EMAIL'))
    cy.get('#edit-submit').click()
    cy.contains('Thank you for applying for an account. Your account is currently pending approval by the site administrator.')
})
This logic above is for a Drupal site and it; loads the website, checks that we can see a link with the text of 'Log in' and if so we click this link. This takes us to the login form where we then check for a 'Create new account' link and we click this link too.
Then we can check that the form has the fields that we need, in the above example I just check if the form has a submit button with the text of 'Create new account' and a CSS class of 'form-submit'.
Then we can use cy.get('element id').type('text') to get the fields in the form using the form element's html id and get cypress to input text. We can then click the submit button and hopefully we should see a message appear with the text matching the message in my above test.
Now you will notice that the above test has some additional lines. This is so that I can add the test data like the domain name, email address to use in the test using an environment file (.env). This is so that I don't need to hard code these values in the test file. We can then add the tests to git version control without needing to worry about potentially personally identifiable information being present. It also means that the tests can be more easily copied onto other websites.
This approach uses a cypress.env.json file, which in my case has data like the following in;
{
  "EMAIL": "[email protected]",
  "SANDBOX_DOMAIN": "https://sandbox.lndo.site/"
}
Then to make this work, we need to add the dotenv package which can be done so using the below terminal command;
npm i cypress-dotenvOnce installed, we can then require this functionality into our test files, like the below.
require("dotenv").config()

let x = Math.random();

it('register', function () {
    cy.visit(Cypress.env('SANDBOX_DOMAIN'))
    cy.contains('Log in').click()
    cy.contains('Create new account').click()
    cy.get('#edit-submit')
        .should('contain', 'Create new account')
        .should('have.class', 'form-submit')
    cy.get('#edit-mail').type(x + Cypress.env('EMAIL'))
    cy.get('#edit-name').type(x +Cypress.env('EMAIL'))
    cy.get('#edit-submit').click()
    cy.contains('Thank you for applying for an account. Your account is currently pending approval by the site administrator.')
})
Once you have mastered writing test files with all of your tests in, you can then think about abstracting the logic out to make your test files more streamlined. For example we can create a class js file in a pages folder called or example login_page.js and have the following logic;
export class Login_page {

    username_textbox = '#edit-name'
    password_textbox = '#edit-pass'
    submit_button = '#edit-submit'

    login(username, password) {
        cy.get(this.username_textbox).type(username)
        cy.get(this.password_textbox).type(password)
        cy.get(this.submit_button).click()
    }
}
We could then include this file into our test file. So our test file would end up looking something like;
require("dotenv").config()
import {Login_page} from "../pages/login_page";

const loginPage = new Login_page()

describe('All login tessts', function () {

    beforeEach(function () {
        cy.visit(Cypress.env('SANDBOX_DOMAIN'))
        cy.contains('Log in').click()
        cy.get('#edit-submit')
            .should('contain', 'Log in')
            .should('have.class', 'form-submit')
    })
    it('login_pass', function () {
        loginPage.login('Admin', 'Admin')
    })
    it('login_fail', function () {
        loginPage.login('Admin1', 'Admin1')
    })
})
The above test file hooks into our js class and instantiates a copy of this class. We can then call this in our tests and pass the parameters that we want to use. This simplifies our test file and allows us to re-use logic without having to duplicate the logic. The beforeEach function that I have used in the above test file allows you to set out the logic that should be ran before each test is ran, which again helps to simplify the logic in the test files by helping to reduce the duplication of logic.
TitleRunning Cypress
There are two ways of running cypress tests. You can use the cypress application UI. To do this, open a terminal window and run:
npx cypress openThis will open a window that looks like the below screenshot.

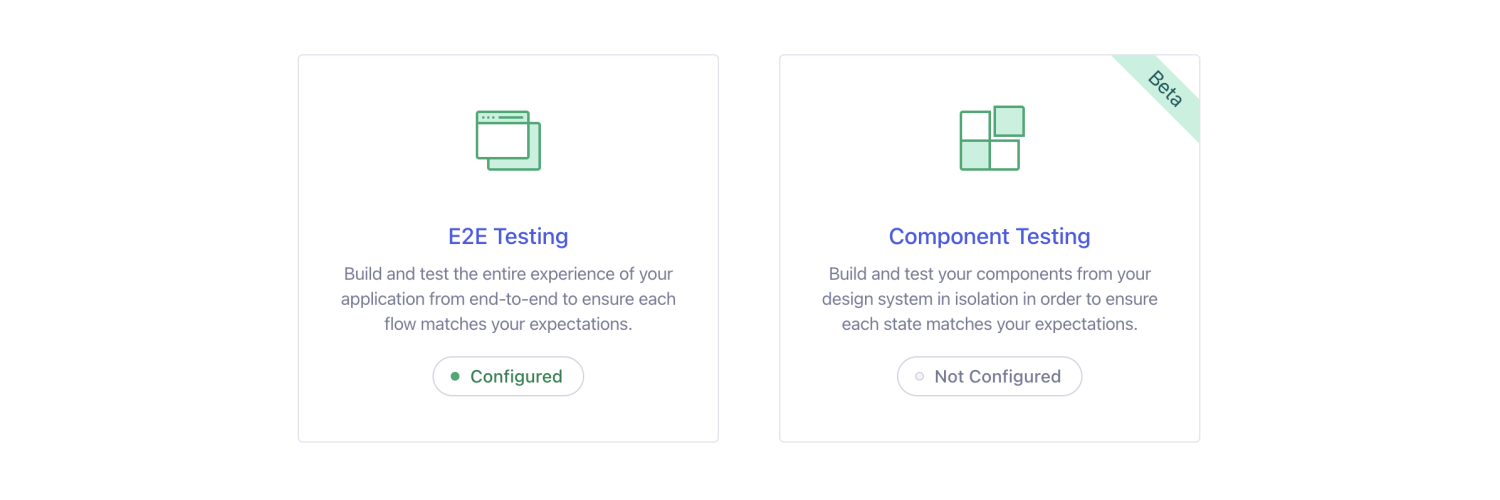
The option that you need to select is E2E testing. You should then see a screen that looks like the below screenshot. Select the browser that you want to test with. Cypress automatically detects which browsers are installed, any browsers not installed that Cypress supports will be greyed out.

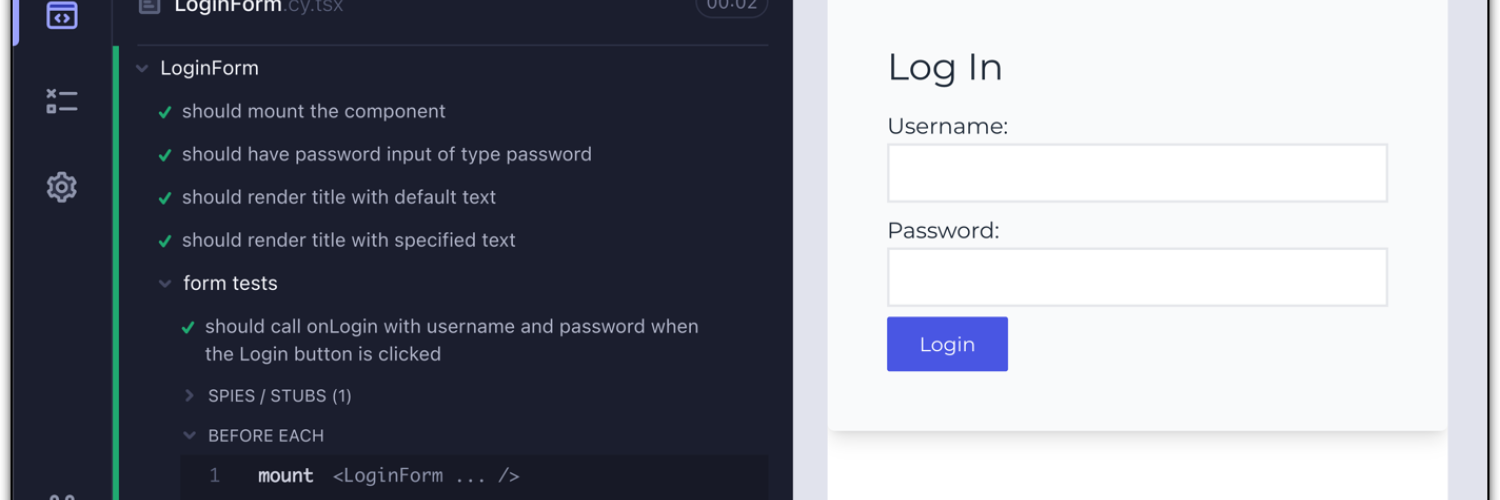
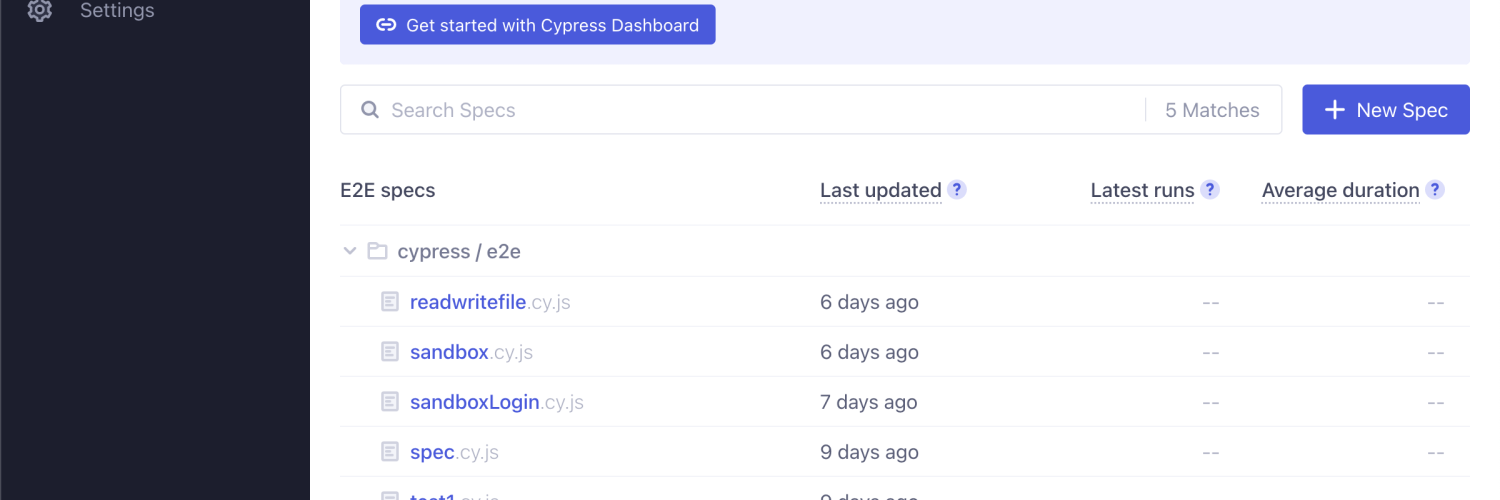
Now you will see a screen that looks like the below screenshot. This screen will allow you to run individual tests. Simply click on a test name and it will run the test.
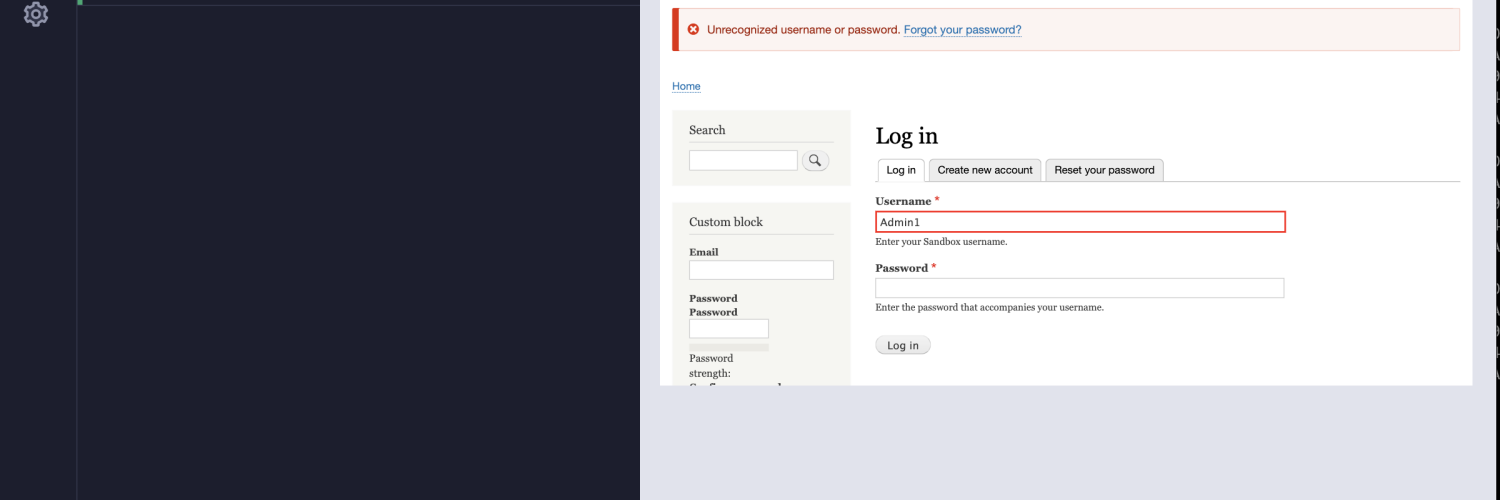
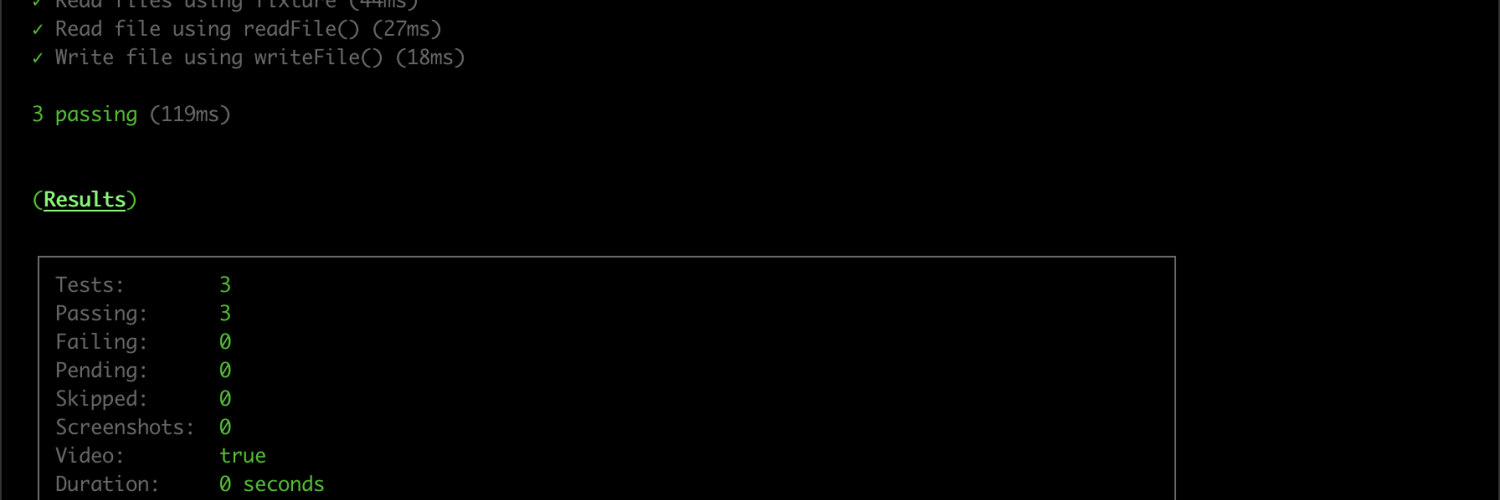
Below is an example screenshot of a test output in chrome. The cypress test runner follows through your test scenarios with visual output of what is going on. You will get feedback as to if a test has passed or failed. If the test has failed then you will see feedback as to what went on to cause the test failure.
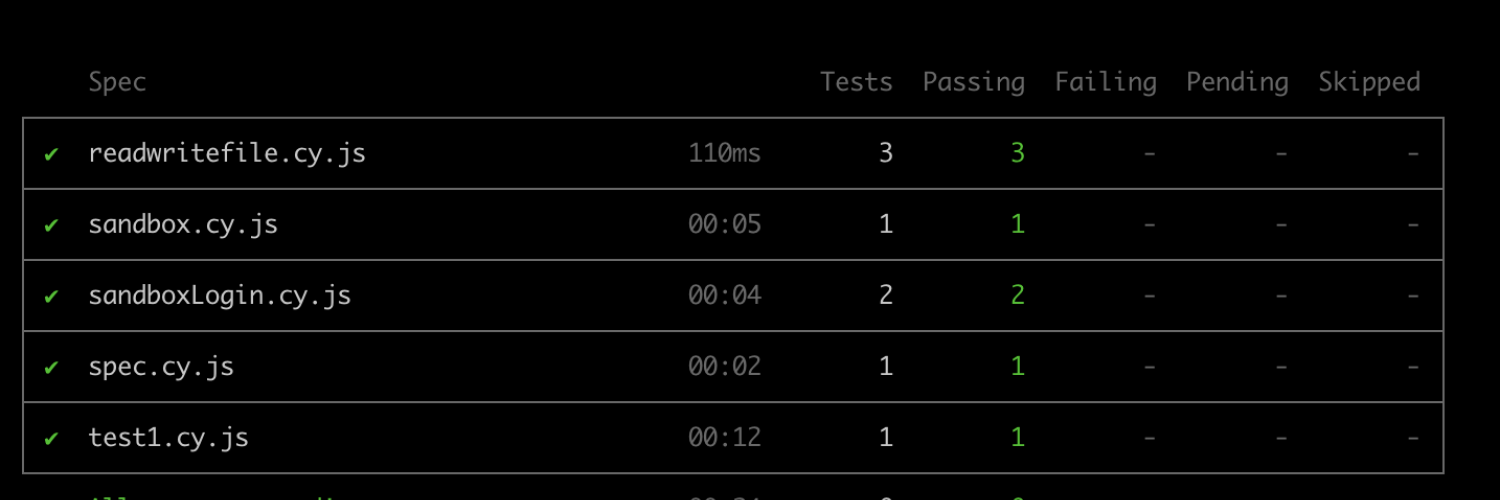
The second method of running tests is using the cli command. This is done by opening a terminal window and navigating to the app's folders and running the following command:
npx cypress runThis will run through all of your tests in the terminal window and give you file locations to screenshots and videos taken if you want to see what actually happened as if you were running the tests through the browser.
Related blog posts
Webform handlers in Drupal 8/9
Authored by Alan Saunders on Sunday, March 14, 2021 - 10:00
Reading Time: 5 minutes
Building a custom page in Drupal 8/9
Authored by Alan Saunders on Sunday, December 27, 2020 - 10:00
Reading Time: 12 minutes
Creating a custom form in Drupal 8/9
Authored by Alan Saunders on Sunday, January 10, 2021 - 10:00
Reading Time: 7 minutes